
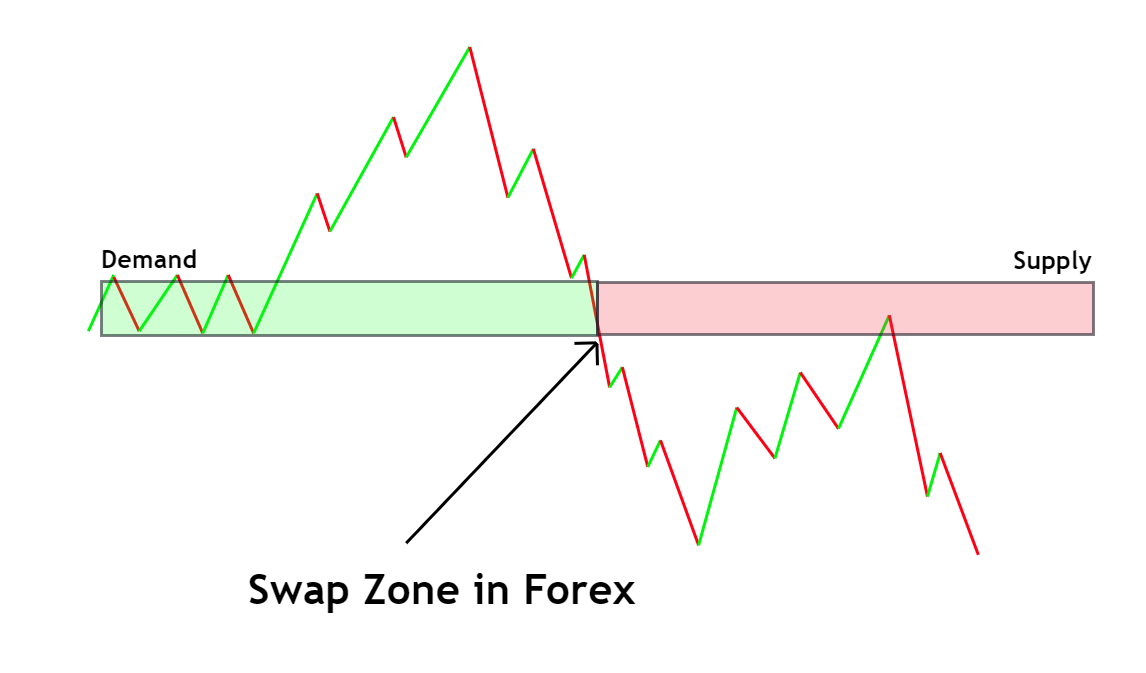
Definition
Swap zone is a price area where the price does not respect the supply/demand zone. After the demand consumption, the demand zone turns into a supply zone. On the other hand, after the supply consumption, the supply zone turns into the demand zone.
Price action is the key to trading in technical analysis, and traders need to understand the psychology of big traders to do trading effectively on the chart like the demand zone shows the presence of buyers, while the supply zone indicates the presence of sellers.
In this article, I will explain the swap zone in detail so you can use it in trading.
How to identify the swap zone in trading?
To find the swap zone on the candlestick chart, first, you should find a good supply or demand zone.
Let me explain with an example.
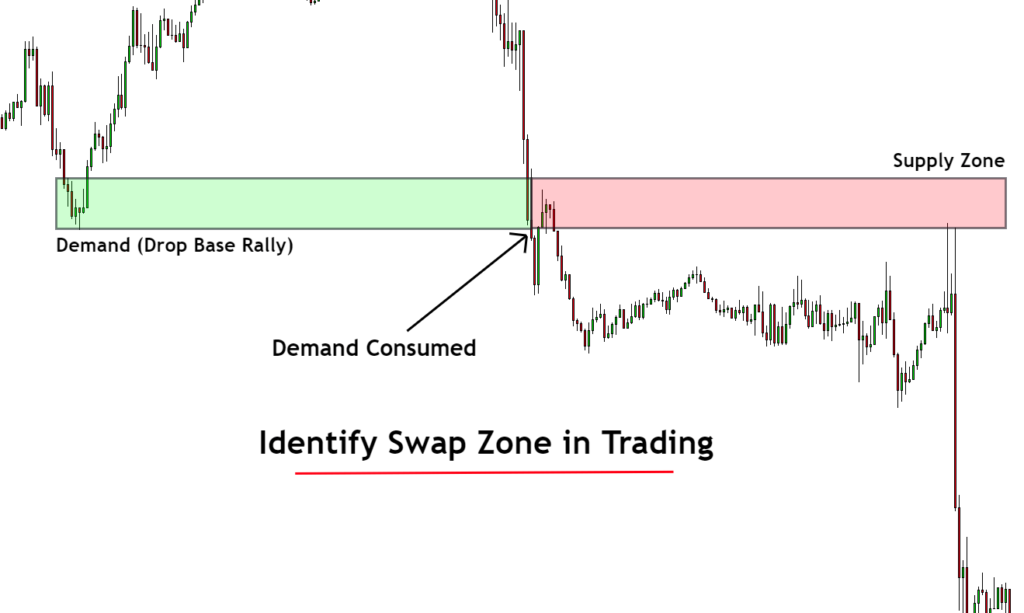
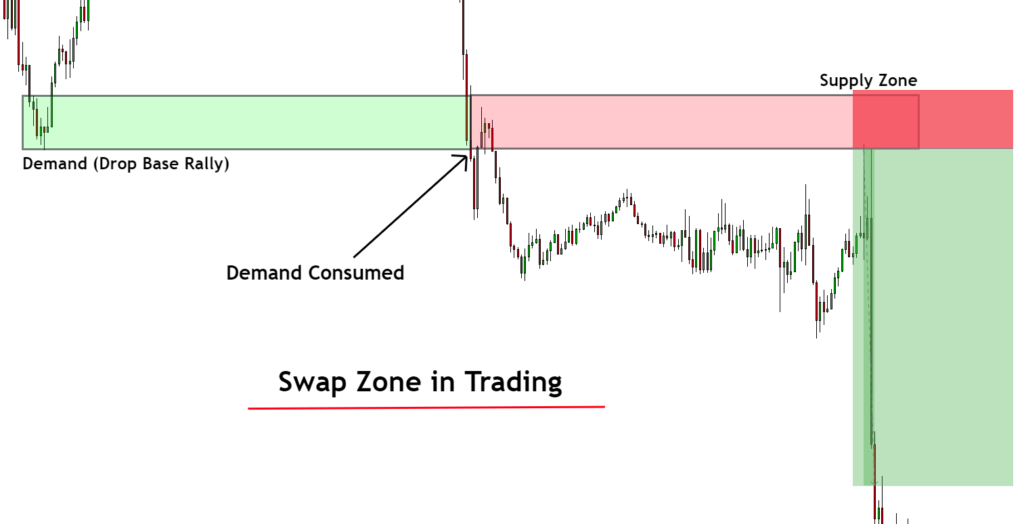
For example, on EURUSD Chart, you found a demand zone on the drop base rally pattern formation. Price then returned to this demand zone after a swing, but instead of bouncing from the demand zone, price breaches through the zone with the big bearish candlestick. This is the indication of consumption of demand in the EURUSD pair.
After the price breaches through the zone, that demand zone will no longer be valid but will convert into a valid supply zone. So you can trade the supply zone when the price returns to this swap zone.
In the same way, when the price consumes a supply zone, then that supply zone will turn into a valid demand zone after swapping. That’s why forex traders call this a swap zone.
What does the swap zone tell forex traders?
To completely understand a trading pattern, you always need to know the psychology behind the formation of that pattern. The psychology of the swap zone is that after the consumption of the demand zone, that demand zone turns into a supply zone.
For example, when a fisherman bought fish and loaded the fish into the truck. After loading, he doesn’t have enough space to buy more fish. It means the demand for fish has been consumed. Now he will go to a town or city to sell fish stock. He will act as a supplier in the town and sell fish there.
In the start, the demand was higher, but with time demand was consumed. After the consumption of demand, that zone turns into a supply zone.
Importance of swap zone in trading
One of the major benefits of the swap zone is that you can trade a failed zone successfully later.
For example, you bought a currency pair or financial asset from a demand zone, but the price breached through that zone, hitting the stop loss. Then you can also trade that zone in the reverse direction later.
If you follow proper risk management, then you’ll be profitable in the end.
For example, in the first trade, you lose due to stop loss. After the swap zone, the demand zone turns into a supply zone. And you trade that failed zone when the price returns to the swap zone, then after winning, you can gain at least 4%+ profit. So, in the end, you’ll be profitable overall.
I highly recommend using the swap zone if you’re a supply and demand trader.
How to trade the swap zone?
After learning the swap zones, our next focus is to determine the valid and high-probability swap zones and trade them.
The best way to determine the high probability swap zone is using the Fibonacci tool. If the swap zone forms at the 50 to 61.8% Fibonacci golden zone, it will be a valid high-probability zone. We will only trade such types of swap zones.
We can’t afford to make more losses from an already failed zone so use the Fibonacci tool to find only high-probability swap zones.
Open a buy trade
When the price breaches a supply zone with a big bullish candlestick, open a pending buy order at the swap zone and place a stop loss below the zone’s low.
Open a sell trade
When the price breaches the demand zone with the big bearish candlestick, open a pending buy order at the swap zone and place a stop loss above the zone’s high.
To learn the trading strategy, I highly recommend using our supply and demand indicator.
The bottom line
Swap zone is an important term that a supply and demand trader must learn. You can recover your loss by trading it as a swap zone if you lose trade on the demand zone. But remember that the swap zone must form at Fibonacci golden zone. Otherwise, I will suggest skipping that zone.